In this tutorial video, I'll show you my process of painting the portrait of a little
dog called SMALL.
The actual time it took to paint this was around 4 hours long.
But this painting video has been edited down to 1-hour in length with occasional commentary
– mostly in the first half of the video.
If you would prefer watching a sped up version of the process, look for the link in the card
if you're watching on YouTube or find a link in the video description that will take
you to a 4-minute long timelapsed version..
First off, I taped down the watercolor paper with masking tape so I can have a clean
margin around the painting once I'm done with it.
You may notice some paint leakage under the tape at the end of the process.
If it's important to you to have a clean margin,
you may choose to buy
Painter's Tape which may be more effective in preventing leakage.
I start off with wetting the entire piece of paper with clean water.
Then I pick up some ultramarine blue and start on the gradient wash in the background.
My background wash is a little bit tricky because I have to work in an arc around the central figure
because I decided on a circular shape or circular direction for the background gradient.
While working on a gradient wash, it's very important to blend the paint while the paper
while the paper is still wet and the paint is still flowing.
This helps you avoid hard lines and creates a smooth gradient.
A spray bottle with water may be useful to mist your paper should it dry too quickly.
So as I proceed I will go over the background several times, for now I just want to
get the color down.
Painting in the background helps the white of the paper stand out as my highlights on
the figure of the dog, which is why I painted the background first.
When I'm happy with my initial background wash, I work the blue into my cool shadow areas.
So you'll see me start first on the nose, and then the dark areas of the ear flaps,
and also some areas on the muzzle.
Then I pick up some Madder Lake, which is my red.
and I work in the warmer shadows on the neck, the tongue,
and the mouth, and other parts of the ear.
And now I add touches of Hansa Yellow
mostly as a base for where the fur is brown and reddish
in color and that's going to give the reds and browns a nice glow afterwards.
Then I go back with touches of red paint
to emphasize the red-brown coat color
in some parts of the fur.
And that finishes my first wash,
and after that's dried,
I'm going in with a second wash of the same three colors.
Now, because I want the colors to blend into one another at this stage
I first wet the areas
into which I will dropping in some paint.
I still use a larger round brush because I'm not looking to create detail.
Mostly I just want to define shapes and separate light and shadow areas or warm and cool areas
by adding variations in the intensity and values of the color.
These initial washes are the most stressful part of the painting process for me,
because at this stage everything can look absolutely messy, but as you will see, as I add in more
and more layers of paint, everything will start to come together.
And a little note for how I paint the eye,
I make sure to leave the highlights untouched, and I add tints of blue
and red to the surface of the eye.
This makes it appear as though the eye is reflecting the ambient light and colors.
So even though the eye is actually brown I don't paint the eye just brown.
Layering of colors is important to suggest
the reflective quality of the eye's surface
And now that I've passed over the painting with my three basic colors a few times,
I go back to the background and saturate it again with the same ultramarine blue color.
Now this is where things start to get really exciting.
I'm adding in Payne's grey to mark the deepest shadows of the figure.
And the nostrils, of course, have some of the darkest shadows.
There's also a lot of shadow within the mouth, and the actual color of the gums or
lips is also quite dark, as are the rims of the eyes and the pupils.
And at this stage, you're going to see the figure really start to take on mass so to speak
and rise up out of the paper as the shapes begin to appear more 3-dimensional.
So for the nose, as with the eye, even though the nose is actually black
you don't just paint it black
as this would make it appear flat and without dimension.
Adding in blues and reds together with the Payne's Grey,
and of course preserving the highlights
helps shape the nose and makes its surface appear moist and reflective
The tongue, of course, also needs to appear moist
so here again we are very careful to
preserve the highlights in this area
Then again I work in another layer of yellows, as well as yellow mixed with red
as I create
separation among the different layers of fur.
So basically, I just repeat this layering process several times, building up the details
with each pass. I'm also saturating the colors where they need to be more saturated and I
darken the shadows where they need to be darker.
Now, to suggest the brown coat color, I use a mixture of red and yellow – so basically an orange hue
And once the fur layers are defined, I can start to work in more of the details of the fur,
this time using a smaller brush and thinner lighter strokes.
Here I'm back to working on the eye again,
and I want to make sure I allow the
tints of red and blue that I painted in earlier to show through and not be obliterated by
the Payne's Grey that I'm painting in now.
So here's an example of how I use the Uniball Signo white gel pen
to correct a slight mistake that I made.
I felt like I had made the right eyeball a little too small, so I use the pen to take
back a little of the rim of the lower eyelid.
Although, if you do choose to correct your mistakes using the white gel pen,
I suggest you do so sparingly.
Now I'm deep into the detailing stage at this point, and I'll continue to use a smaller
round brush to shape the fur, and emphasize some of this dog's features.
And I'll frequently check my reference photo to guide me in this.
Remember, I'm not trying to copy the photo exactly, I may choose to over emphasize
or over saturate some colors here and there depending on where I think it would enhance
the final look of the subject of the painting.
And I do really love this stage of the process, it's like you can almost see the finish line
But you do have to be careful not to overwork your painting and to know when to stop.
So what helps me decide this is – I take a few breaks now and then, and take my eyes
off the painting – and when I come back to it I can see better where the painting
still lacks or if I can call my work complete.
So now we're at the halfway mark of this hour-long video
and the next commentary to follow after this
is towards the end.
I'll leave you to enjoy watching the rest of the painting process, or you may, of
course, choose to skip directly to the end part.
And I'll see you guys at the finish.
And here at last is our finished product.
One of the last things I did was
to draw in the whiskers using the
Uniball Signo white gel pen
And I also painted in a little bit of turquoise
into the background color
to help intensify the contrast between the
figure and the background.
So this painting is at last complete.
I've sandwiched it in between two boards
for it's protection and to frame it nicely.
And with it I'm going to include
this Certificate of Authenticity
that I've signed
and also a Instructions for Care card
And this is ready to ship out
I'm just gonna
put it in some protective packaging.
I hope the new owners enjoy it,
I certainly enjoyed painting it for them.
And I hope you guys enjoyed watching these
tutorial videos.
Please do subscribe to my YouTube channel,
or follow me on my Instagram or Facebook accounts.
And thank you so much for watching.
I'll see you guys in the next video.
Bye.
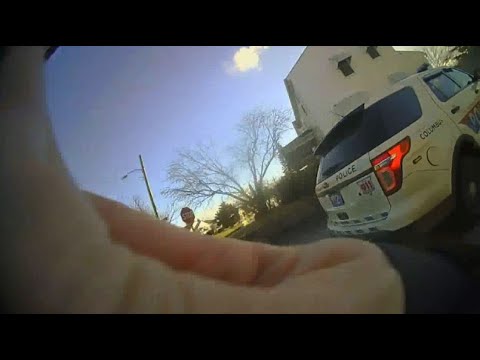 For more infomation >> CPD releases video of moment suspect drove off in cruiser - Duration: 0:38.
 For more infomation >> Video: Tom Messner is looking for snow and rain in the forecast. 2.13.19 - Duration: 4:08.
  For more infomation >> VIDEO: 'End the Violence' Vigil held for man killed on Springhill Avenue - Duration: 2:11.
 For more infomation >> Protesting Hazleton Area viral video - Duration: 2:36.
  For more infomation >> VIDEO: Neighbors call recent crash site a dangerous intersection - Duration: 1:36.
Không có nhận xét nào:
Đăng nhận xét