Daddy Finger, Daddy Finger
Where are you?
Here I am, Here I am
How do you do ?
-------------------------------------------
Sandra Shaw's Video Forecast - Duration: 0:44. For more infomation >> Sandra Shaw's Video Forecast - Duration: 0:44.
 -------------------------------------------
Beginners guide to Learn 3D in Houdini 16 - SideFX 3D Video Tutorial: Procedural Interface and nodes - Duration: 37:27.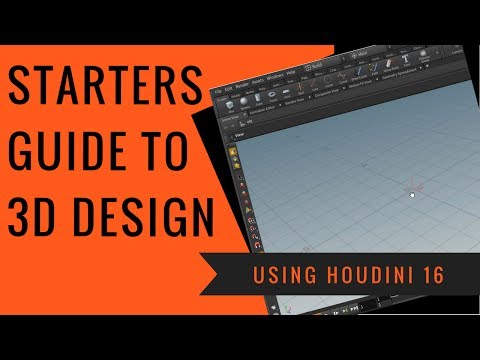
hey guys so today we're going to look at a very beginner look at Houdini and
looking at the interface how to navigate everything for the absolute beginner
into Houdini so looking at the top here we have a menu setup right here and we
can look at a lot of different things that we have here different settings and
preferences and stuff like that one of the first things when you're working
inside of Houdini is that you're going to want to set up a project whenever
you're working on anything so this will give you a hierarchy of folders that you
can save into and you can say this is our intro project and then it's going to
set it to home which is inside of the my name document and then it's going to go
into Houdini projects intro project and it's going to create all these
subfolders for us so I'm just going to click accept and now that we have done
that we have the file structure set up but we haven't saved the actual file
itself so I'm going to click Save and you can see here that it already took us
automatically into the intro project which is what we wanted to do so I'm
going to call this intro and accept so now we have our file structure the way
we want it so that we can work inside of Houdini if you look at this tab on
the side it's kind of nice you can collapse things that you're not using
that often and collapse it so that way you kind of get more real estate on your
screen so you can actually go through and collapse pretty much anything that
you have access to here inside of Houdini it gives us a lot more space
which is nice okay so underneath the menus here we have our shelves the
shelves have a lot of quick these tools that we can get to I use
these sometimes I find that I don't use them as much as I used to when I was
starting off but it's a nice way to get a lot of things that are kind of
pre-built and they are just really quick access tools that you can get access to
but I do use them just not as much as I used to I guess um looking on this side
here this is just kind of an expansion on the shelf so there are more shelves
that we have here but you'll see that there's kind of this little divider this
divider you can actually slide back and forth so if you want more room on one
side or another you can do that because if you go too far this way you'll see
that we're kind of cropping off some things and if we want to access to it we
have to push the arrow so that we can see everything that we have available to
us there so if I expand it then I have I can see everything here but I can't see
everything on this side so I would have to click the arrow to go back and forth
so it's just kind of giving us access to being able to see more things if we
needed to down here is our kind of main working area and in this working area
it's our viewport right now that we're seeing or our scene view we can switch
this out to be basically anything right now we have some tabs that are set up
here so we have the scene view the animation editor rendering view
composite view motion effects and geometry spreadsheets so if we go
through here you can see that they all look very different and they have their
own tasks for what they're doing but for the most part what you're going to have
open here is the scene view and it's just not limited to these things if we
click on the plus and we look at new paint up type we can actually create
pretty much anything so if we want to we can
see a Python shell for example if you're typing Python or something like that we
can access it that way so it is really flexible we can even take a tab that
we're using over here and switch it over into this window so you can actually
grab tabs and move them from one section to another depending on what you are
doing at the moment so sometimes it's more useful for you to have something on
one side than another and you can completely customize it which is nice
let's see they have here and build we have different kind of layouts that we
can look so if we go to animation we can see that it lays it out different than
build which is the default setup and it has a whole bunch of different kind of
layouts that you can create if you wanted to you can always go back to
build that's default one and you can save current desktop as so if you change
anything and you want to save out a special type of desktop that you like to
go back to a lot you can do that here and then I'll give you a tab to be able
to load it and then you can load that particular thing or if you kind of
change things around I can go back to build and just reload current um because
if we load current desktop and it will switch it back to what the default it
was so if by accident you did something that you just didn't know what happened
what you did that you messed something up so that you ended up something like
that you can go back in and reload current desktop and it will get you back
to the defaults so you're never too far off if you think you've messed up
something with the way your layout is so again like I said most of the time what
you're going to have here is your viewport so with the viewport
or you want to be able to navigate in your viewport obviously so inside of
Houdini if you want to orbit around the world it is hold down the spacebar and
then click and drag and that will rot... or orbit your camera around in the
viewport this is done with the spacebar so holding down the spacebar click and
drag and the click is a left mouse button click then we can do the spacebar
and middle mouse button click and when we drag with that we can pan our scene
at the current orientation that we have and then we can do spacebar right mouse
button drag and that's going to allow you to zoom in and out so that's pretty
useful that allows us to navigate inside of our view another thing that we can do
in our viewport here is if we look at our perspective setting we can change
our perspective viewport to be an orthographic view here if we wanted to
so if we wanted to look at it straight from the top we can do that we can go
back to the perspective view and up here on this top view section right here we
have single view for view to stack and a whole bunch of different options so if
you want to be able to see it in a different layout you can switch out that
way it also has a shortcut where you're doing control one control to control 3
and that will switch out your views for you also if you push 1 2 3 4 you have
some presets of different camera ortho graphics or perspective views that you
want to get into so that is pretty useful and then up here right now by
default we have our parameters open so again we have a whole bunch of stuff
that we can look at but by default the parameter is visible here and that's
what most people start off working with there and then down here is our scene
view this is basically where we modify and work with all of our nodes inside of
Houdini so let's create something really quick if I click in here and I push tab
it brings up our tab menu the tab menu basically gives us a list of things that
we can go ahead and create the other thing you can go through all these menus
and everything but typically what I do is just push tab and then start typing
so I know what I'm looking for is a geometry node the geometry node is a
placeholder node that will give us a piece of geometry by default is this
kind of cube shape it's not really cube but it is just a placeholder object that
we can go in and swap out with something else so that gives us this note here
that we can work with the geometry node here let's look at this node if you look
at this i right here to your node information so if there's any
information you can go there and look at it right now this is just kind of basic
geometry there's no information in there so that all it is is doing it telling us
that there's no time for there selectable so this can be selectable so
if we go into the viewport and we want to select it we can select it and here
we have the display flag so if we turn that off by clicking on this we can make
the display not visible inside of the scene view and that's all the basic
stuff that we have with this geometry node here we have
inputs and outputs so right now we don't have anything else in the scene but
let's say we had just go in and create another geometry node we can connect
them together then this is basically creating a parent link we'll look at
what is that later right now we don't see two objects we only see one because
they're right on top of each other so
inside of Houdini 16 we have a shortcut that we can use which is why why brings
up our wire cutters which basically if we click and drag it draws a line and it
cuts the connection between nodes it's pretty awesome new tool starting out in
Houdini 16 that we have access to now so now they're not parented and let's look
at moving one of the pieces of geometry that we have here so on the left hand
side of your scene view here you have some manipulator tools this tool here is
as the move tool if you hover over it you see that it has a T next to it so
that means that that is the shortcut so if I push T on the keyboard it will go
to that tool if I look over here s for select it has a shortcut key R for
rotate and E for scale and then this is the gizmo tool which is show handle
tool here and it is kind of a combination of all of those tools but if
you have another tool selected it might be something different but in this case
right here is just giving us the ability to move things and do all three at the
same time so I'm going to go to the translate tool
or the move tool and here and a viewport I can click on the arrow and move it so
now we can see that we actually have the two different objects and I selected it
here in the viewport so that I can have access to it I can switch back and forth
and select them that way or I can click in the viewport and
that way and with this move tool if I look at it I have arrows so when I pull
and move on the arrows it lets me move in just a single axis at a time we also
have these little squares so when I hover over it you can see that it shows
an X Y and what that means for us is that I can move in the two axis here
that is flat on the XY plane over here I hope for it you can see the Y Z and then
we have this one which is the X too so it gives us quite a bit of different
options to be able to move to do all those actions as you saw me kind of
going back I was just doing control Z which is an edit undo ctrl Z just to get
back to where I was so that is the move tool also see when I have these objects
selected or if I select on these nodes here you can see in the top section here
I have the parameters because we are in the parameter if I click off of
everything it's going to leave that last selection because I already accessed it
but basically we're switching back and forth and we have parameters so we can
type in a specific value in here if we didn't want to kind of leave it to
eyeball e and we needed something very accurate we can type in values here we
can even do expressions and things like that we won't go over that in this
lesson but just know that you can connect things here other than just a
direct numerical value you can actually write an expression and have procedural
animation or positioning happening through an expression okay so yeah that
was the move tool let's go over to the rotate tool I can click the button here
or I can click R on the keyboard that gives me access to be able to
rotate again you can click on the individual axes lines so you can rotate
on a specific axis one at a time this one on the outside here lets me rotate
based off of the current view of the viewport so it will have different
effect depending on how I'm looking at this geometry and then if I click on the
center in the kind of gray area of this view I can actually tumble in all three
accesses which is kind of an interesting way to be able to move it if I want to
get it back to the origin I can kind of try to eyeball it and get it pretty
close to be as far as possible or I can go back in here and type zero zero zero
and zero and it will reset my orientation so that is the rotate tool
and then we have the scale tool here with the scale tool we can scale in a
single axis at a time so I'm clicking on that little line in here and whatever
axis I want to do so that will give you the single axis you have this shape
right here and we can scale on two axes at a time so that was what was this from
the XY this one is the Y Z and then we have the X Z so we can do two at a time
and then um let's see if we click on the triangles I believe it's out here on the
outside part we can do it uniformly yeah so that lets you scale your objects
uniformly um let's see what else do we have here that would be good to know
well let's look at the show handle tool here it's pretty interesting because we
can rotate anything we want we can also let me get in there
go okay here we can move and I think we want and then we have these here we can
move in different access fees and things like that so it kind of gives us access
to more tools than just kind of the basic ones but it is it can change
depending on what tool you actually have access to at the time what you have
access to work with so be careful with that let's look at maybe creating some
other pieces just and other than these placeholder pieces is geometry let's say
we wanted to change our geo one here and we wanted to create a different piece of
geometry maybe a sphere or something like that
so what I'm going to do is take this file node because it's looking to import
something and we can see that right now we have a default geo and actually I
don't think if I said exactly how to get into here so if I did - so if I'm
repeating myself but in the object mode here I'm just going to double click on
the geo that gets us into the node editor for our object there this is what
they call SOPs and we're at the top level of this object so here basically
we're loading this default be or dot be geo file which is this file right here
in this case I don't want that I want to have a sphere so I'm going to select the
push delete on the keyboard that gets rid of that shape for me then I am going
to push tab here and I'm going to type in sphere and you can see as I type in I
have access to this here and I can create it there
it creates fear for me with this year we have different kind of modes and things
that we can create this sphere in if we want polygons polygon mesh and different
options and stuff like that but that's going further that I want in this
particular video I just want to show you that you can create objects in here we
can add a whole bunch of stuff to manipulate this object to make it look
like whatever we want but just know that this is the main area where we will work
and do things with this object so I'm going to go back to the object level by
clicking on object here so it's kind of like a hierarchy we went into that
object and now we're jumping back out to our scene level so I have geometry tool
to here I'm going to double click on that and I have this file note again so
I am going to delete it and push tab and let's say this time I want a torus just
so we have something different I can click that torus and put it in there
and you can see that I've with the sphere when I created it and I created
it by default place it in the center and this time when I created the torus it
created it off to the side and that's because I moved it at the object level
so we can see that it is three units let's make it something even four units
here so when I go into the torus it's taking that information and feeding it
into here so that's something else to keep in mind is that the tool here is
kind of separate we can see that the center here for the object inside of
SOP level is at zero zero zero whereas in the object level for geometry - it's
called this t torus Geo so we can actually rename things by clicking on it
and renaming it here see geo so we can kind of be able to
access and name it and know what we're working with a little bit easier so
going inside of this torus it's Zero Zero Zero but out here we are at four zero zero so
that's where we're setting the world for everything that is in this object so
let's say we wanted to manipulate this and we took it and edit a transform node
so the transform node is kind of in the SOP level how you can go in and
manipulate it so right now I change the eyeball or the display flag from here
because if we're looking at this that's the furthest down the chain that we can
see it to the transform node here so with the transform node with the eyeball
now I can actually go in and move this and let's say I moved it negative four
units so it shows like it's at the center but basically what we're doing is
kind of counter balancing what we did here so we're not really changing this
value at all we're actually just moving it from whatever it considers its world
so in this case when we look at it at this level here we are seeing it at the
origin of its world which is at zero over here so if I push Y and I cut this
connection here the center should be at so I actually manipulated it here I
wanted to manipulate it here on the transform so I can do negative four so
if I push the display flag here you can see that here the spheres here and we're
viewing it at this level as soon as we jump down to the next level the sphere
has moved over to that section so it doesn't really lose the history of that
the origin is here it really gets manipulated at this point
and shifts it over I can move it up and it keeps that history only based off of
what is here so if I were to click on it we can see kind of the wireframe of
where it is but the main active thing is whatever it has display which is that
and again if i push Y I can cut it and it doesn't have a connection so I have
this transform information that is there but it doesn't have any information
feeding into it in order for it to work we have to draw this connection by
clicking on the outputs of this to go into the input of the transform node so
when we have something like this in our scene it doesn't necessarily have to be
individual object so I'm going to go back to the object mode right here and I
am going to select all of the nodes that we had there and delete them and let's
say I wanted to create a sphere I'm going to push alt and where is it
control there we go control and click on the sphere and when
I do that it creates it there in the origin you can see that it created this
geometry node for us this is geometry here but it's created it as a sphere
object and it already has that sphere connected so this is kind of like a
shortcut way to create those few steps that we just did to create a sphere so
let's say I move that up here I can actually take this and let's say
actually I'm going to yeah want it there so I'm going to select this and copy and
paste those ctrl-c ctrl-v and I created another sphere this sphere
I want to move it up and you can see that I don't see that other sphere
because they're not connected but if I go over here
I have the other sphere that is actually there so I have two spheres inside of
this geometry node that we created if we want to be able to see them together we
can actually do a merge node and with this merge node you can see that this
input node is a different shape so that means that we can actually input a lot
more than just two things if we wanted to we can keep on inputting more and
more things to go into this merge node so if I click the display flag here you
can see that now we see both of these objects and let's say I wanted to
manipulate this I can go here and adjust it so maybe I can take in the radius
maybe and adjust it and here what I'm doing is clicking on the radius middle
mouse button clicking on it and it gives us these increments by so I can say I
want to go by point 1 increments and then drag and you can see that all the xyz
are all changing at the same time to be able to change that then I can move
down and this is point 0 1 so I can go at a smaller increment level or point 0
0 1 you can see that it moves much slower so we can also go in the opposite
direction so we can go we want to do it by once so it scales and goes down
pretty big or pretty fast so let's say I want to kind of leave it something like
that and I move the center to kind of be a little bit like that and then I can
another way that you can actually do this which is pretty interesting is so
here we've created two pieces of geometry and we merged it down into this
bottom section where is the merge what we can do is create something like a
transform node let me put it over here where you can
see it so I'm pushing tab push transform
there we go so with the transform node I can connect the inputs of this
sphere into the transform and then click it into the merge so now we have this
sphere kind of coming in twice when directly and want to do the transform so
if I push the eye socket here on this transfer we can see that there is a
valley that's changed and I'm going to go here and select it on the merge so
even though I have the display flag I can actually select a piece of geomet... oh I mean node
change the properties here so I'm changing something up higher but I want
to see the result down here so I can now take that and move it up and maybe scale
it down a bit and just move this back up again so here we can see that we have
three different spheres that we kind of stacked on top of each other but with
the spheres on basically what we're doing is adding them all into one piece
of geometry and also we're doing it in different ways we can make a direct
connection we can make a direct connection here again but with that same
direct connection we can do a transform and create multiple things here so if we
wanted to really what we could do is take that and connect it to the original
sphere and we have a transform so since the geometry is kind of more intense
more processing that's happening and then we are just manipulating that one
piece of geometry what we can do is copy and paste this transform again
and on this one maybe put it up higher and scale it down again and then merge
this one down and together with the other ones and you can see now we only
have one piece of geometry but we are affecting our and then we end up having
three of them to do the way that we've done this procedurally so I hope that
makes sense um we can since this kind of looks like a snowman let's go in and we
can do something like a maybe let's look at what we have here as options if you
go into polygons push tab go to polygons or primitives actually is what I want to
see you can see different objects that we have access to summit is actually
going off the screen here because there's more things that we can get down
at the bottom so let's we can make this big here maximize play pane so it is
let's try this I'll be that didn't work this to control B there we go
so with the control B we can actually
make any one of these windows actually fullscreen so in this one I'm taking
this pane here making it full screen and that's push tab here so that I have a
little bit more room I can look at primitives you can see that there's even
more stuff that is popping out here [COUGH] excuse me
and that's just because I increased the resolution to be able to or decrease the
resolution so that I can have things be a little bit bigger for you guys so that
you can see it a little bit easier usually by default all these things are
a bit smaller and these menu items and things like that are smaller so right
now it's kind of going off to the end there I don't know it's
it is probably created that there okay so I'm going to go back into this
sphere here and maybe create a tube so tube is kind of like a cylindrical shape
that we can work with and we can actually take that and merge it into
there you can see that it looks kind of hollow so let's go back there okay so
the tube looks hollow if we look at the options here we can click on this
checkbox and that will give us end caps which is pretty nice we can adjust the
radius so I'm going to take that radius down and kind of take this radius down
come adjust the height also so I'm going to bring that maybe more down and I'm
going to adjust the center to kind of come up maybe move this a little bit
actually I don't want it move it that way I want to move it towards the front
and I don't have any real orientation setup here other than creating it on a
different axis so I can create it on the x-axis and say that that's the way I
want that point to come out so here I'm going to make this smaller and this one
smaller as well so I can kind of kind of make a carrot shape it's very primitive
at this point but it kind of gives you an idea of what you can do with some
primitives is there in place
so now we have kind of little carrot coming out from the spheres there to
kind of give it a direction and whatnot but that's the general idea if we go
back into the object mode here and I select this this is the main geometry
let's recall rename this to something like snowmen and now that we've done
that we can move it all as one whole object here so I can move it I can scale
it if I want I can rotate so it gives this a whole object that is the Snowman
but it's made out of multiple little pieces here and again there's much more
to kind of go over it and work with this to kind of make it more detailed and
make it look like a higher quality model but this is just a basic overview of how
to use Houdini in a very basic look and also going into the nodes creating nodes
to be able to create something that you can see inside of there again we can
make it things dynamic we can add particles to
make it snow in here and things like that but that's out of the scope of this
video I hope you guys enjoyed it learn something and um check back on filmmakerperez
here and i'll upload more tutorials as time goes by I hope you
guys found this useful we'll see you guys in the next lesson bye
Không có nhận xét nào:
Đăng nhận xét