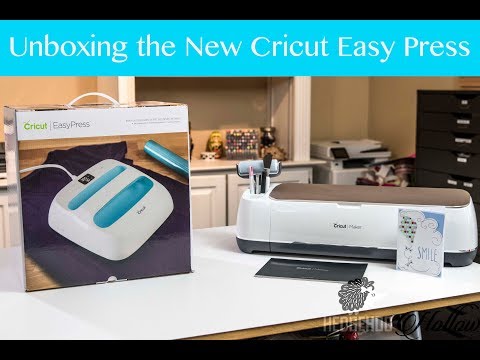
hi welcome to Hedgehog Hollow - Alexandra and today I'm back with my unboxing of
the cricut easy press plus we're going to attempt a first project as well now
yesterday I did an unboxing of my Cricut maker which you saw to the side of me
here we unboxed it we had a look at the things that come with the machine a few
accessories that I bought and I thank you why I chose to buy the Cricut maker
as well so do check that out it'll be linked in the top right hand corner
right now there'll be a link to that video for you as well plus I've also
started working with it you saw at the front here that I have done the project
that Cricut guides you through when you set it up with your computer or your
iPad they guide you through how to make that project it was really easy I'm
really impressed with it so far great clean cuts didn't have to adjust the
blades so much easier in my opinion than when I used my Sicilia silhouette cameo
3 so I'm going to be doing a video of my first week with the Cricut maker so when
I cut things out when I play with things I'll show you what went right what went
wrong and things I like or maybe things I didn't like so stay tuned for that
coming up next week as well but today we're here to talk about the easy press
so ideally explained previously I have a traditional heat press it's big its
bulky it never comes out the closet I don't like having it around with the
girls I tend to burn myself or then you overcook the t-shirt or you undercook
the t-shirt so many things of guesswork which is why I bought the easy press so
after some research there's some great things on the back here so I read these
out to you it gives you a countdown timer so it beeps when the iron-on
transfer is complete it gives you a precise digital control with the time
and with your temperature so you can adapt it accordingly and we'll go
through that later you have that comfort handle so it's a bit like using an iron
press so think of it you pick up the iron with the handle and you put it down
as opposed to having to lift things up and down you've got the safety base so
that keeps the easy press off of your surface protects oppose the easy press
and your tabletop as well it's 9 by 9 so it's a really good size and it heats
evenly or again a fantastic feature and it has an
auto shutoff after 10 minutes as well so if you leave it on and you walk away
it's going to shut off but it does heat back up again easily so let's unbox and
then we can start our first project as well so let's take a look what you get
in the box I noticed the opening is here on the
bottom so far I found the Cricut packaging to be really good
let's just get rid of that then we have a rubber plate here so this is the plate
that it stands in so it's got these raised silicone pieces and things for it
to sit on another one of those
instruction guide and let's do this in the bottom so this is our easy press
will break the sticker seals there so this is what we have this is the easy
press it's got a nice handle in here as well that we can hold and we have some
controls on here so this is our screen which will show us the temperature and
the time and there buttons along there I'm sure we'll work out what to do with
those for your unbutton you've got the C button and you've got a plus and a minus
so you can just put it in here there's also a warning about high temperatures
and causing injury and all those fun things as well so let's have a look at
what is you know let's see this box so we have an instruction guide for the
Cricut easy press we'll work our way through that when we start our first
project we have a stop look protect for the best iron-on transfers always use a
heat resistant flat surface for a list of recommendation foundation mats please
visit our website so that's on there as well so we'll take a look at that too
they pre-cut this lovely glittery teacup for us it's also a piece of what feels
like cord in here for our first project there's some instructions for our
practice projects which we'll get onto shortly there's a quick reference chart
here as well so it says the iron-on type and whether you're using foil light or
metallic glitter or holographic it tells you temperatures your timers all those
kinds of things this is the kind of thing I think I'll probably laminate and
then keep near my ez press as well and then we have our warranty its safety
instructions and statements on all those kinds of things as well so let me get
plugged in and then we can do our practice project so I'm all plugged in
and ready to attempt our first project I did some reading up on pressed mats as
the instructions suggested and there is going to be an easy press mat it's not
available yet but it's coming soon so as soon as that is available do check out
the description below because I'll hook up the link to that and I'll let you
know on the blog as well now I've also got my mats ready based on what I read
and they suggested using a white bath towel so I'll sorry any bath towel I
should say I just happen to have a white one here they said to fold it so it's
around three inches thick which I've done nothing embroidered or textures in
it at all just a plain and fluffy bath towel and I've also just popped
underneath my pressing mat that I use when I saw this is something I made it's
got heat-resistant batting in it and a cotton fabric I have sewn some lines in
here to keep that batting in place which is why I still put the towel over the
top as well so let's turn on our press and we can start going so we're going to
first of all press the on button and it's going to show me some temperatures
and some times so first of all we're going to set our temperature to 340 so
I'm just going to do temperature button and we're going to go all the way up is
doing in five degree increments so we're going up to 340 then we're going to
press timer and we're going to put that at 20 seconds so timer
and that's 20 seconds so it's now heating up and it's showing me the
temperature as it goes so we're going to wait for that to get to that 340
fahrenheit in the meantime let's grab our piece of fabric that they supplied
us with this is the teacup they've cut from the white glitter HTV vinyl now
each TV you put straight on on the back and it has a clear piece on the front
that will peal on peal off after we've completed the project so first of all
you want to pop that on there the fabric I would say is kind of a chord heavy
linen so it's a reasonably thick fabric that we're working on and now I'm just
gonna wait for this to heat up we're up to 140 so there you heard my Cricut beep
and there's a few things I was just reading there in the instruction guide
while I heat it up so mine is in Fahrenheit they bought it in the US I'm
going to assume that if you buy it in Europe it's gonna be in centigrade I
can't see at the moment anyway to change it if I find that I'll let you know in a
future video it does say before iron-on application
for awesome results pre wash and thoroughly dry your fabrics when washing
do not use fabric softener if you have no time for washing you'll still get
pretty great results it also says that during the iron-on application just
before transfer pre-heat your fabric for three to five seconds to remove wrinkles
and moisture and after during your design flip the fabric and repeat on the
other side so let's do that first I'm going to remove my teacup I'm going to
pick up my press and we're just going to give it those few seconds to heat up it
so there's three to five so I think we're probably there now so I'm going to
lift that off we're going to pop our teacup on so you want to Center it
wherever you would like it then we're going to pop my ez press back on again
and we're going to hold it down and press that C button that starts the
timer so it will let us know when we are done it also says that after application
week at least 24 hours before washing always wash inside out do not bleach
wash only in cool water and then tumble dry low or lay flat to dry for foil ions
hand wash in cold water only and it also gives us a link for some more
information as well so once our beep have gone off like that we're going to
now flip our fabric over and we're going to apply this for an
10 to 15 seconds and then we're going to leave it to cool completely so that's
about 15 seconds so I'm now going to remove this and I'm going to wait for
our fabric to cool before we remove that layer on top so I've left need to call
it took about 10 minutes or so to be completely cool and I actually put it on
my work surface because this towel was quite warm so the next thing we want to
do is peel off that clear protective layer and we're all done so if you sort
of just bend the fabric that clear acetate will just come up if it doesn't
come off easily it's not cool enough it's not ready to go you may even need
to repeat the heat process if it wasn't long enough and but just give it a few
more minutes to call and you should find that it peels off really easily like
this one just did so now I feel that off we have our heat transfer vinyl on there
it's completely flexible it's just like having a motive on your t-shirt so thank
you so much for joining me here today our Hedgehog hello I hope you've enjoyed
this unboxing do you give us a thumbs up and click that subscribe button or stamp
it if you prefer if you don't already subscribe here to hedgehog Hollow we'll
have lots more unboxings for you we'll have more on the cricut maker the easy
press and also the bright pads I also have on order join me again very soon
for another inspiration video happy stamping bye
you
 For more infomation >> Faithful: Session 1 video - Duration: 11:59.


Không có nhận xét nào:
Đăng nhận xét